How To Roast Coffee Beans the Right Way
Key Takeaways
-
Roasting transforms green coffee beans by developing aroma, flavor, and body
-
The roast level (light, medium, dark) affects acidity, sweetness, and bitterness
-
Timing, temperature control, and airflow are crucial for consistent roasts
-
Home roasting can be done using simple tools like a pan or popcorn popper
-
Fresh-roasted coffee delivers better flavor when allowed to rest for 12–72 hours before brewing
Roasting is where coffee becomes coffee — transforming hard, green, grassy beans into the rich, aromatic treasures we grind and brew. But despite its importance, roasting remains mysterious to many home coffee lovers.
Learning to roast your own beans is like unlocking a new layer of control over your daily cup. It’s not just about freshness; it’s about customizing your flavor profile and appreciating the complex process behind every sip.
Let’s explore what roasting actually does, how it works, and how you can do it right at home.
What Roasting Actually Does
Green coffee beans contain sugars, acids, moisture, and compounds that hold potential flavor — but they don’t taste like coffee yet. Roasting applies heat to trigger a series of chemical reactions, including:
-
Maillard Reaction: Turns sugars and amino acids into aromatic brown compounds
-
Caramelization: Further develops sweetness and body
-
First Crack: The point when beans expand and begin to pop like popcorn
-
Second Crack: Deeper roast development with more oils and smoky notes
Controlling these reactions is the art of roasting.
Choosing Your Roast Level
There’s no best roast — just the right roast for your taste. Here’s how they differ:
Light Roast:
-
High acidity
-
Fruit, floral, and tea-like notes
-
Lighter body
-
Ideal for highlighting origin characteristics
Medium Roast:
-
Balanced acidity and sweetness
-
Chocolate, nut, and caramel tones
-
Medium body and mouthfeel
-
Versatile for most brew methods
Dark Roast:
-
Low acidity
-
Bitter, smoky, or toasted flavors
-
Oily beans, fuller body
-
Works well with milk-based drinks
Choosing your target roast level determines how long and how hot you’ll go during the roast.
Tools You Can Use at Home
You don’t need a $1,000 roaster to get started. Try one of these beginner-friendly setups:
1. Stovetop Skillet or Pan
-
Requires frequent stirring
-
Inexpensive but hard to control heat evenly
2. Popcorn Popper (Hot Air Type)
-
Affordable and quick
-
Good airflow, but limited control
3. Oven Roasting
-
Easiest for beginners
-
Uneven results and smoky if not ventilated well
4. Dedicated Home Roaster
-
Offers consistent results and control
-
Great for regular roasting, but an upfront investment
Whatever your method, have a fan or open window nearby. Roasting gets smoky fast.

Step-by-Step Guide to Roasting Beans
-
Preheat your device (pan, oven, or roaster)
-
Add green beans — start with small batches (½ to 1 cup)
-
Agitate constantly — stir or shake to avoid scorching
-
Watch and listen — beans will go from green → yellow → light brown
-
First crack begins — the beans audibly pop; light roast is ready soon
-
Continue for deeper roast — darker color, more oil, second crack begins
-
Cool beans immediately — pour into a colander and stir with a fan
-
Rest beans for 12–72 hours before brewing to allow CO₂ to release
Tips for Better Roasts
-
Use high-quality green beans — roasting won’t fix bad raw coffee
-
Roast outside or in well-ventilated areas to manage smoke
-
Keep a log — note time, temp, and results for repeatability
-
Smell matters — burning smells = too hot, grassy smells = underdeveloped
-
Avoid overcrowding your pan or popper
Roasting Mistakes to Avoid
-
Over-roasting: Results in burnt flavors, flat sweetness
-
Under-roasting: Grassy, sour taste with undeveloped sugars
-
Skipping cooldown: Beans continue roasting unless cooled rapidly
-
Brewing too soon: Coffee needs time to rest and degas
Patience and small adjustments lead to better, more consistent results over time.
Enjoying the Fruits of Your Roast
Once roasted and rested, grind and brew your beans within 2–3 weeks for best results. You’ll notice more depth, freshness, and balance compared to pre-ground store-bought coffee.
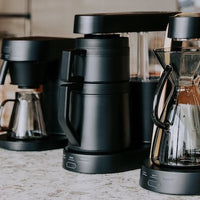
The flavors you unlock through roasting will also respond to your brewing setup. Coffee machines from Ratio Coffee, known for consistent temperature control and brew cycles, help extract the most from your carefully roasted beans without overshadowing the subtle notes.
Home roasting isn't just about DIY bragging rights — it’s about connecting to the process and enjoying a cup that’s uniquely yours.
Frequently Asked Questions
Can I roast coffee in a regular frying pan?
Yes, but you’ll need to stir constantly and monitor temperature to avoid scorching.
How do I know when to stop roasting?
Listen for the first or second crack and watch the color. Use smell and sight as your guide.
Can I roast flavored or decaf coffee?
You can roast decaf beans, but they react differently and require slightly lower heat. Flavored coffees are usually flavored post-roast.
How long should roasted coffee rest before brewing?
Allow at least 12–24 hours for degassing. Lighter roasts benefit from up to 72 hours.
Do green beans go bad?
They have a long shelf life (6–12 months), but should be stored in a cool, dry, and dark place for best results.
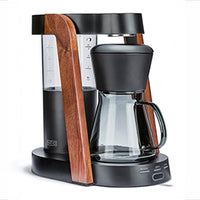 Ratio Eight S2
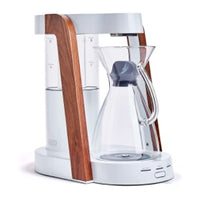 Ratio Eight Original
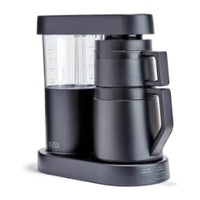 Ratio Six
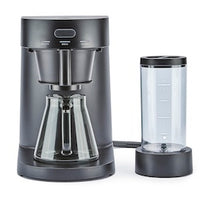 Ratio Four
 Compare Machines


