The Ultimate Guide to Frothing Milk at Home
Frothing milk at home transforms ordinary beverages into café-style delights, offering an indulgent layer of texture and flavor to your favorite drinks. You might wonder how to froth milk easily without professional equipment. With various methods available, including the classic whisk and the modern milk frother, you can achieve the perfect froth no matter your level of expertise. Whether you're passionate about crafting the perfect cappuccino or simply looking to enhance your morning brew, understanding how to use a milk frother effectively ensures a consistent and creamy texture. Frothing milk for coffee isn’t just about the look, but about enhancing your drink’s overall taste and experience. Explore this ultimate guide to unlock the secrets of achieving that perfect foam at home.

Understanding the Basics of Frothing Milk
Creating the perfect froth begins with understanding the milk's properties you plan to froth. Dairy milk varieties such as whole, 2%, and skim, each offer different textures and flavors when frothed. Whole milk often results in a creamier and more stable foam, while non-dairy alternatives, such as almond and soy, demand unique frothing techniques. Grasping these subtle differences is your first step towards mastering how to froth milk effectively at home.
The tools you use are equally crucial in frothing milk for coffee. While a handheld frother is convenient, a steam wand offers more control and precision for excellent results. If you're a beginner looking to learn how to use a milk frother, starting with a simple handheld device might be beneficial. Each tool offers unique advantages, so try different methods to see which best suits your taste and skill level.
Temperature plays a significant role when frothing milk. Ideally, milk should be heated between 150°F to 155°F, ensuring optimal texture and flavor. Too hot, and the proteins break down; too cold, and it won't froth properly. By honing this balance, you can elevate your coffee experience and broaden your skills significantly.
Frothing milk at home is anticipated to grow in popularity over the next few years as more home baristas perfect their techniques. As you explore frothing technologies, you're stepping into a realm that promises both immediate satisfaction and long-term evolution of coffee culture. This hands-on journey will enrich your daily routines and your taste palate.

Choosing the Right Type of Milk for Frothing
What impact does the type of milk have on the frothing process? Understanding the characteristics of different milks can guide you in selecting the right kind, enhancing your frothing efforts. Whole milk is often favored for its balanced combination of fats and proteins, providing a rich, creamy foam that's delicious in a variety of coffee drinks. As you experiment, you'll find how these qualities affect your frothing experience.
When considering other dairy options, you might try 2% or skim milk. While 2% still offers a decent texture for frothing milk for coffee, skim milk produces a lighter, airier foam due to its low fat content. Each choice offers a unique mouthfeel, encouraging you to adjust techniques as you discover how to froth milk to your liking.
Non-dairy milk alternatives are also popular among home baristas. Almond milk can be a great choice if you're seeking a nutty undertone, while soy milk often creates a surprisingly smooth foam. Using a milk frother with these alternatives might demand a bit more precision, but the results can be wonderfully rewarding when properly mastered.
Coconut milk presents an exotic option with its creamy texture and distinctive taste. Frothing this type takes skill, as its water content can differ from traditional choices. Oat milk stands out for its natural sweetness and ability to froth similarly to dairy milk, making it another excellent contender for those looking to expand their frothing repertoire without compromising on foam quality.
Ultimately, the type of milk you select can significantly determine how your frothed milk complements your coffee creations. Trying various kinds offers an insightful journey into the subtleties each contributes to your daily brew. As you discover how to use a milk frother with each type, the evolving froth will undoubtedly enhance your coffee enjoyment, inviting ongoing exploration and refinement.
Essential Tools for Frothing Milk at Home
A comprehensive frothing setup at home begins with the right tools to ensure success. A handheld milk frother is a versatile, easy-to-use tool perfect for beginners learning how to froth milk. Compact and battery-operated, it aerates milk quickly, providing a consistent froth for both hot and iced drinks. With its affordability, it's a popular choice for daily coffee enthusiasts seeking convenience.
For those looking to elevate their frothing skills, a steam wand offers greater control and professional-level froth. Found in many espresso machines, it injects steam directly into the milk, creating microfoam suitable for latte art. According to recent studies, the steam heat helps denature proteins in the milk, which, according to scientific explanation, facilitates the texture needed for intricate designs in coffee presentations.
Another valuable tool is the electric milk frother. This device heats and froths milk simultaneously, delivering a rich and velvety consistency. Ideal for those wondering how to use a milk frother with ease, this all-in-one option saves time, making it a favorite for families and individuals who desire a quick, fuss-free frothing process.
Equipping yourself with these tools empowers you to explore various frothing techniques and textures. Each tool contributes differently to the art of frothing milk for coffee, allowing you to tailor your process to meet your personal taste. As you become more familiar with these essentials, the quality of your homemade beverages will significantly improve, offering delight in every cup.
The Perfect Temperature for Frothing Milk
Achieving the perfect temperature is a pivotal aspect of frothing milk, impacting both flavor and texture. Most baristas recommend heating milk to a range between 150°F to 155°F. At this temperature, the milk's natural sweetness is released, resulting in a smooth, appealing froth. When you're learning how to froth milk, monitoring the temperature closely ensures that you capture the ideal balance of heat and creaminess.
It's worth noting that overheating can lead to undesirable changes. Milk heated above 155°F risks losing its sweetness and can develop an unappealing burnt taste. Overheated milk also loses its ability to create a stable froth, impacting the overall quality of your coffee. Using a milk frother with a built-in thermometer can aid in maintaining the ideal temperature, helping you avoid these pitfalls.
One unpopular opinion about frothing milk suggests using slightly chilled milk for an initial froth. While counterintuitive, some aficionados believe that starting with colder milk allows more time to aerate and create finer bubbles before the milk reaches the ideal frothing temperature. Experimenting with this method can lead to interesting insights and textures, especially if you're eager to experiment with your frothing technique.
Different types of milk may require slight temperature adjustments. Non-dairy alternatives, such as almond or coconut milk, might not froth well at the standard temperature; they may benefit from a slightly lower range. As you familiarize yourself with various milks, you'll discover how each type responds to heat, enhancing your ability to craft the perfect frothy concoction.
Mastering temperature control is not just about technique; it's about understanding how heat interacts with milk's components. This knowledge is crucial for crafting consistently delightful beverages. As you refine your skills and explore these nuances, your coffee creations will flourish in quality, providing a richer experience with every sip.

Step by Step Guide to Frothing Milk with a Steam Wand
The process of frothing milk with a steam wand begins with ensuring you have the right setup. Pour cold milk into your frothing pitcher, filling it halfway to allow for expansion during steaming. This initial setup is crucial for achieving a silky texture, whether you're frothing milk for coffee or enjoying a standalone treat. Start by positioning the steam wand tip just below the surface and at a slight angle for optimal aeration.
Creating microfoam starts with turning on the steam to introduce air into the milk. Lower the pitcher gradually, allowing the wand to draw in air at the surface. As the milk expands, keep the tip near the surface to continue incorporating fine bubbles. For example, seasoned baristas in specialty coffee shops often aim for a texture resembling wet paint—a creamy, glossy surface that indicates perfectly aerated milk.
When the milk reaches about 100°F, submerge the wand tip deeper into the milk. This move transitions you from aeration to steaming, heating the milk to the ideal temperature of around 150°F. Maintaining this depth minimizes bubbling and enhances the milk's natural sweetness, resulting in a perfectly balanced froth that elevates your drink.
After steaming, give the pitcher a few firm taps on the counter and swirl the milk. This action integrates any large bubbles, further refining the texture. Understanding how to use a milk frother proficiently, especially a steam wand, involves knowing these minute details that significantly impact your results.
Pour your steamed milk into your coffee, guiding the texture with steady, controlled movements. This final step of the frothing journey is where artistry meets science, allowing you to create stunning visuals and delightful flavors. As you refine these steps, your process will become seamless, capturing the essence of what a perfect coffee experience should embody.

How to Froth Milk Using a French Press
Transforming your French press into a milk frother is an excellent strategy for creating creamy froth at home. Begin by heating your milk to the optimal 150°F on the stove or microwave. Pour the warm milk into your French press, filling no more than a third to allow room for frothing. This method provides a delightful alternative for those without an electric milk frothing tool.
To effectively froth milk with a French press, you need to plunge with deliberate movements. Rapidly pump the plunger up and down, allowing air to be incorporated and create a silky texture. To truly understand this technique, you need to shift your mindset from seeing a French press solely as a coffee maker to embracing its multifunctionality in your kitchen routine.
After achieving your desired froth, let it settle for a few moments. You'll notice the bubbles become finer and the foam more stable, perfecting the texture for your coffee creations. This newfound application of a French press empowers you to froth milk without additional gadgets, showcasing the versatility of kitchen tools you already own. As you master this skill, you enhance your home coffee experience, adding a professional touch to each cup.
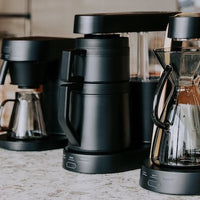
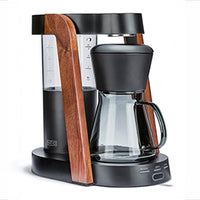 Ratio Eight S2
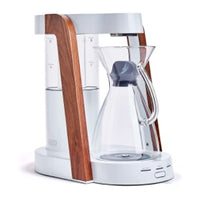 Ratio Eight Original
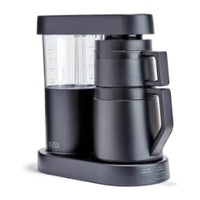 Ratio Six
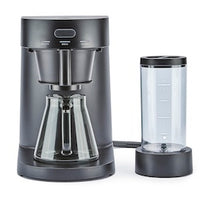 Ratio Four
 Compare Machines


